How to Register for Classes
You may register on the Web from any computer that has Internet access, or come to any SJR State campus for assistance.
-
Open the College website
Open the College website at SJRstate.edu and click on the MySJRstate button in the top left corner of the homepage.

MySJRstate button on the College homepage. -
Complete the User Acceptance Policy
For first time users, click on the User Acceptance Policy and follow the steps. For help, see First Time Log In. For returning users skip to step 3.
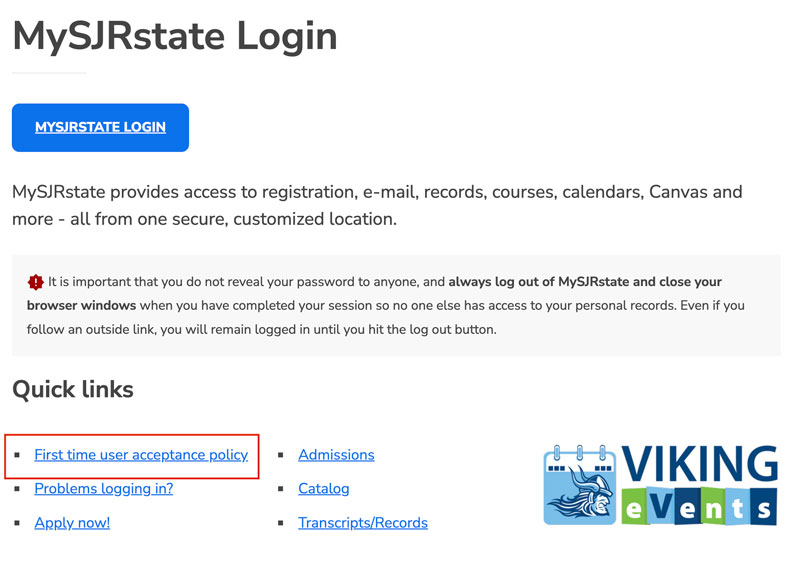
Select the User Acceptance Policy for first time users. -
Login to MySJRstate
Login to MySJRstate using your username and password.
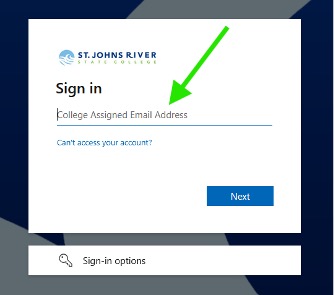
Login to MySJRstate using your username. 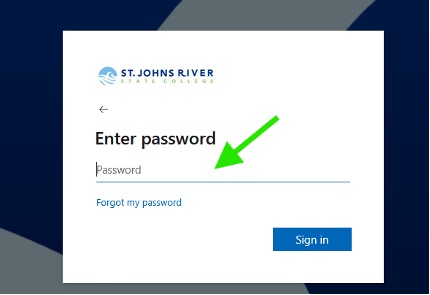
Enter your password. -
View Course Availability
You may view classes by clicking on the Registration Information link under the Important Links Card, which can be found on the homepage of the portal.
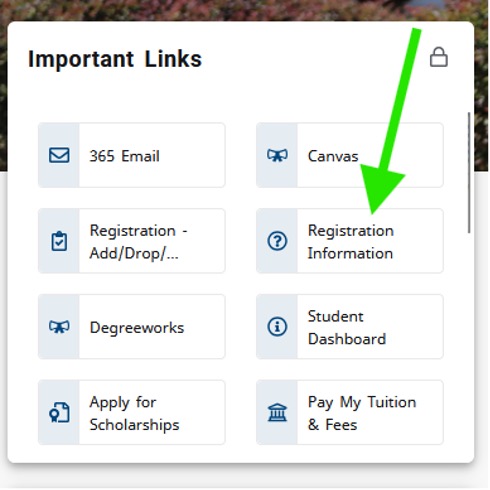
Under Important Links, select Registration Information
This will open up Course and Registration tab which provides you with a View Course Availability Link.
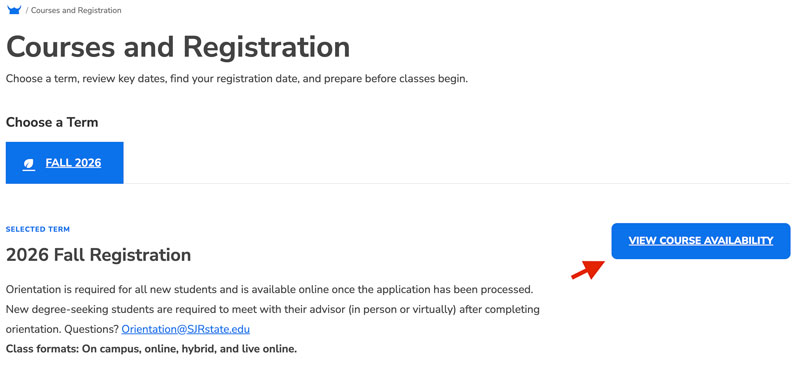
Click the Course Availability Link
After clicking View Course Availability it will take you to a page with a drop down menu to select your term.
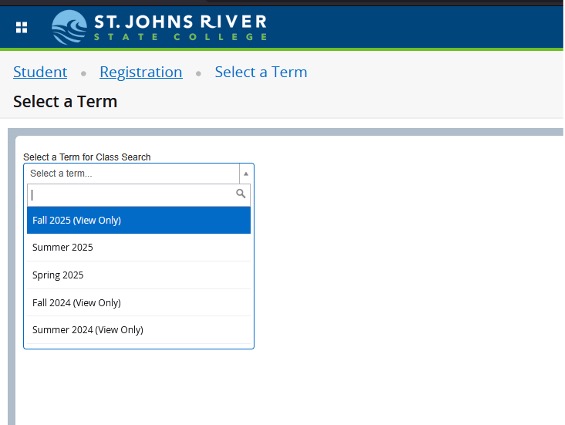
Use the drop down menu to select a term. -
Open the registration landing page
Another option to access classes is under the Important Links Card select Registration - Add/Drop/Withdraw New to go to the registration landing page where you can check your Registration Status, Plan Ahead, Browse Classes and Register for Classes.
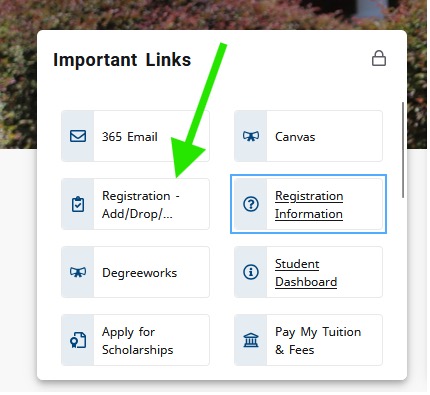
Select Registration - Add/Drop/Withdraw New. -
Review registration options
Check Registration Status for any holds, information, times and dates. Use Browse Classes to view classes, Use Plan Ahead with your Advisor to create plans to stay on track and Use Register for Classes to select classes for the upcoming term.
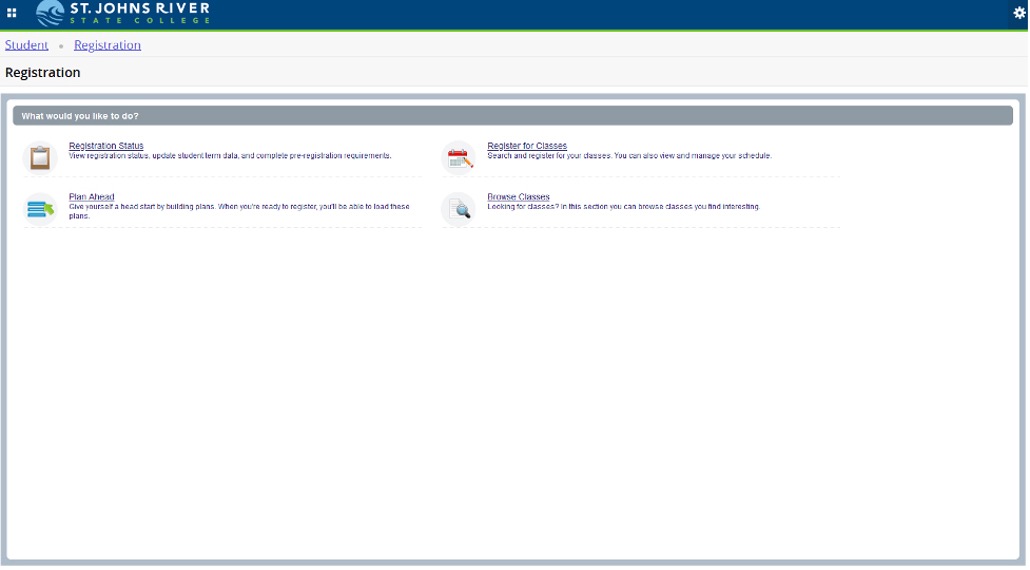
Check Registration Status and Browse Classes. -
Select the registration term
To register, click Register for Classes, then use the drop-down menu to select the term you are registering for. Make sure to select the right term.
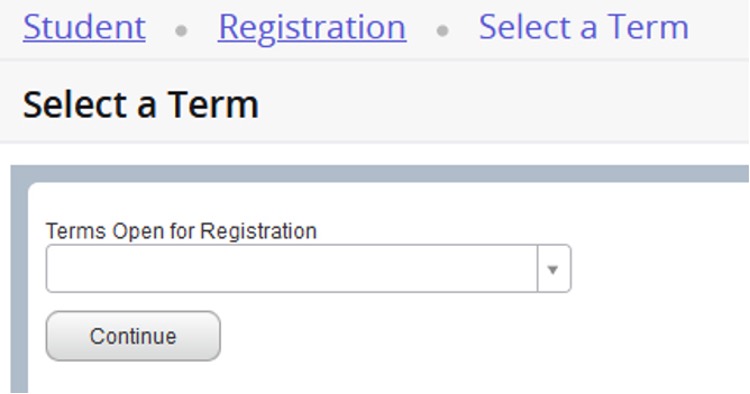
Select Register for Classes. release_alert Important: Make sure to select the right term.
-
Search for classes
You can register by searching for classes by subject, course number or using the advanced search. You can also register by clicking on Enter CRNs tab and enter the CRN. If you have seen your advisor and have created Plans then you can use the Plan tab to add your classes.
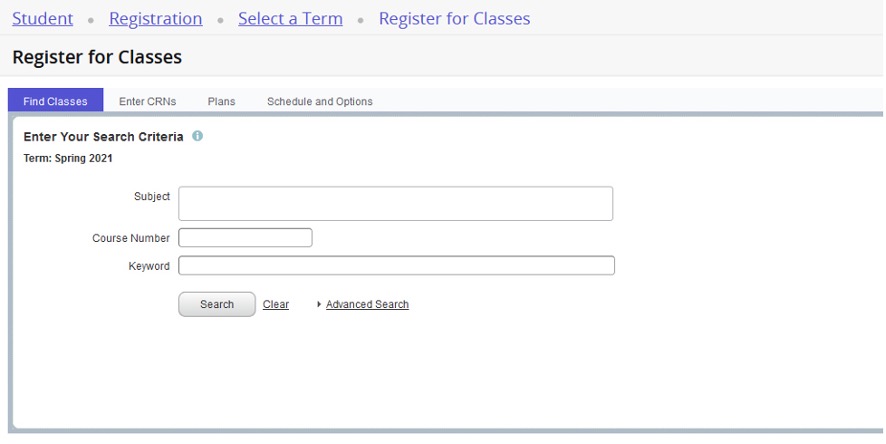
Search by subject, course number or advanced search. -
Submit your registration
After all your classes are showing in the Summary Box (lower right corner) then click “Submit”.
- If you see “Registered on the Web,” you are registered for those classes
- If you see “Stop! Registration Error,” the class may be closed, or there may be a prerequisite or co-requisite error. Select another course.
- If there are other errors, call the Help Desk at 386-312-4142.
Review the Summary Box and select Submit. -
Review financial aid and payment
Most financial aid will immediately post if you have satisfied all admissions and financial aid requirements. If not, contact your local financial aid office. To pay online by credit card or debit card, click on the "Web Payments" link and follow the instructions to pay registration fees.
-
Print your schedule and bill
To print your receipt and your class schedule, click "Return to Menu" and then click on "Print Schedule/Bill". A small screen will appear with the link to view the schedule and bill. Click the "View Online Schedule Bill" link. Then print the schedule screen.
release_alert Important: Registration is not complete until the balance is paid in full.